Using Your Own SQL Queries For Tables With Modern Data Sources In SSAS 2016+ And Azure Analysis Services
Reposted from Chris Webb's blog with the author's permission.
While the integration of the Power Query engine into Analysis Services Tabular 2017 and Azure Analysis Services with modern data sources will certainly bring a lot of benefits, I think it’s fair to say that the implementation has not been entirely painless. One problem is that it is no longer obvious how to specify your own SQL query to populate a table or partition in your Tabular model – and while the Query Editor is great, there are a lot of cases where this is necessary. In this post I’ll show you how to do this.
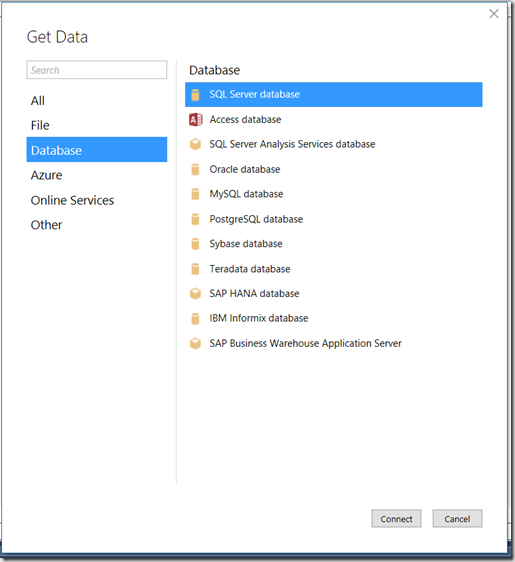
If you’re used to using the Power Query UI in Excel or Power BI Desktop, you’ll notice that when you connect to a SQL Server database using the SQL Server connector in SSDT:
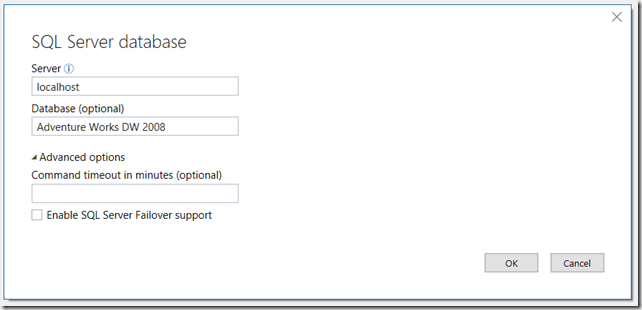
…there is no option to enter your own SQL query when you do so:
This is deliberate. In Analysis Services, unlike Power BI and Excel, there is a distinction made between data sources and other M queries that return data from those data sources, one that makes a lot of sense in my opinion. While it is possible to enter your own SQL for other data source types, such as OLE DB connections, a data source object is really intended just to define a connection to a data source and not to define what data you want from that data source.
[You may also notice that there’s a “SQL statement” property on a SQL Server data source visible in the Visual Studio properties pane, but I don’t recommend you use it – it doesn’t seem to work well with the rest of the SSDT/Power Query UI]
To import a table or view in your database all you have to do is right-click on your data source and choose Import New Tables; my blog post from September last year describes how to do this, and how to use M functions for creating partitions.
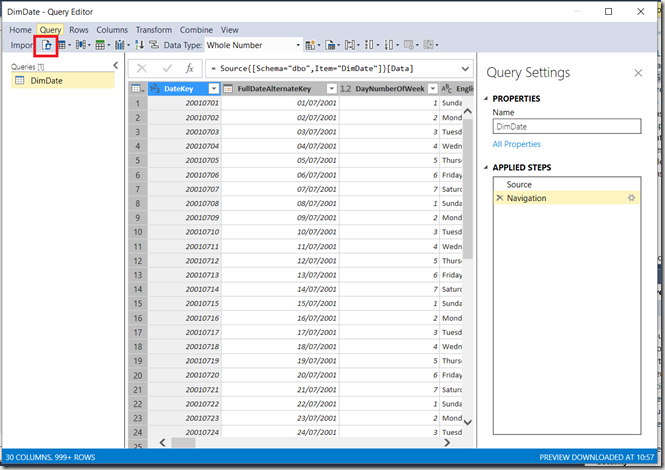
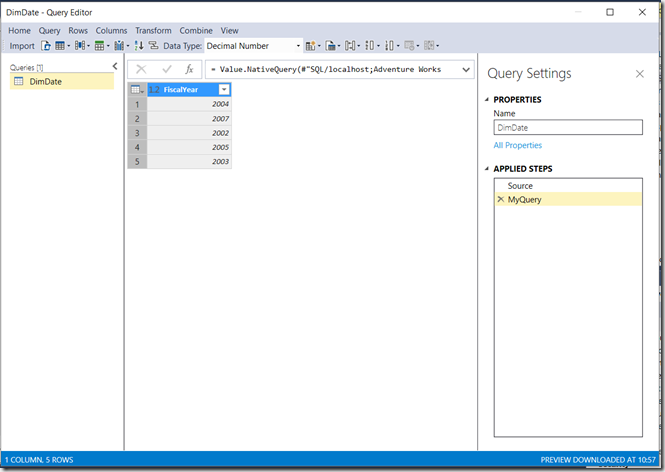
To use your own SQL queries though you need to write some M code. First, import a table – any table, but preferably a small one – and get to the Query Editor UI. In this case I’ve imported the DimDate table from the Adventure Works DW database:
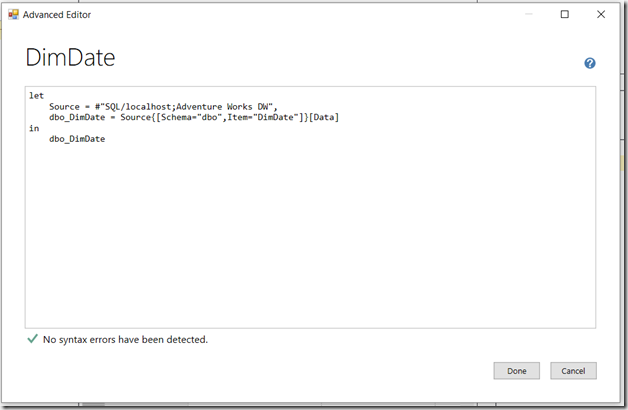
Next, select your query in the Queries pane on the left-hand side of the screen and open the Advanced Editor either by clicking on the relevant button in the toolbar (shown above) or by right-clicking on the query name in the Queries pane. You’ll see the following dialog:
The M code will be something like this:
let
    Source = #"SQL/localhost;Adventure Works DW",
    dbo_DimDate = Source{[Schema="dbo",Item="DimDate"]}[Data]
in
    dbo_DimDate
In this example the Source step creates a reference to the data source you have already created, and the dbo_DimDate step gets the contents of the DimDate table from this data source.
You can modify this code to use your own SQL by using the Value.NativeQuery() function (which I have blogged about here):
let
    Source = #"SQL/localhost;Adventure Works DW",
    MyQuery =
	Value.NativeQuery(
		#"SQL/localhost;Adventure Works DW",
		"SELECT DISTINCT FiscalYear FROM DimDate"
	)
in
    MyQuery
Here what I’ve done is replaced the dbo_DimDate step in the previous query with a step called MyQuery that uses Value.NativeQuery() to run my own SQL.
Now all you need to do is click Import and you have the output of the query loaded into SSAS. It would be nice if there was UI support for using your own SQL queries when importing data in the future. Note that, as soon as you use this method, any other steps or queries further downstream will not be able to perform query folding, so you should make sure that you do as much of your filtering and transformation in the SQL as possible otherwise you may encounter performance problems.
The documentation describes a similar – but not identical – workflow for achieving the same result here. Personally I think it’s counter-intuitive that you should click on Expressions to create a Table object! Expressions are used for functions and other M code that is shared by the M queries used by Tables.
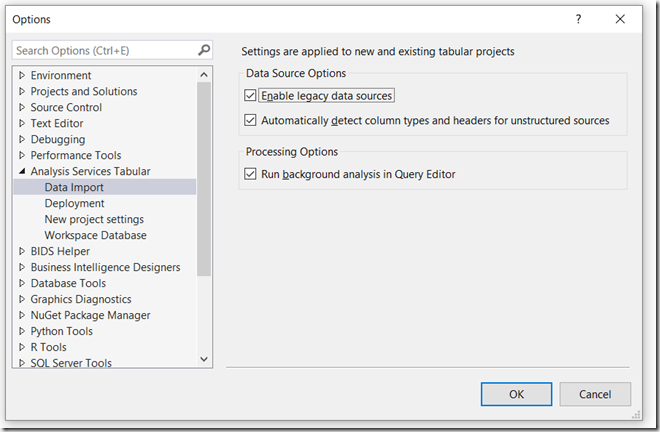
An alternative to doing all this is to go back to the old way of doing things and use a legacy data source rather a modern data source in SSDT. You lose the ability to use the Query Editor and M if you do this, but in a lot of cases you probably won’t care. The 17.4 release of SSDT for Visual Studio 2015, released in December 2017, has exposed a property that allows you to create legacy data sources again easily. In Visual Studio, go to the Tools menu and select Options and in the Options dialog go Analysis Services Tabular/Data Import and check “Enable legacy data sources”:
When you do this, you’ll notice two new options when you right-click on Data Sources in the Tabular Model Explorer pane: Import From Data Source (Legacy) and Existing Connections (Legacy).
This gives you access to the Table Import wizard that was available in previous versions of Analysis Services Tabular, which not only allows you to enter your own SQL but also creates a legacy data source that in turn makes it easy to use your own SQL when creating partitions.
 |
Chris has been working with Microsoft BI tools since he started using beta 3 of OLAP Services back in the late 90s. Since then he has worked with Analysis Services in a number of roles (including three years spent with Microsoft Consulting Services) and he is now an independent consultant specialising in complex MDX, Analysis Services cube design and Analysis Services query performance problems. His company website can be found at http://www.crossjoin.co.uk and his blog can be found at http://cwebbbi.wordpress.com/ . |
Tags: connectivity, tabular, azure

